Overview:
GL opening balances are the starting balances entered for General Ledger (GL) accounts when beginning to use N3 AI Accounting system or when migrating from another accounting platform.
This process is commonly performed by accountants, finance teams, implementation consultants, or system administrators during initial system setup or financial year transition activities.
Setting up accurate opening balances helps ensure that financial reports, trial balances, and account summaries reflect the correct starting financial position of the company.
Opening balances are generally entered for balance sheet accounts such as Assets, Liabilities, and Equity. Depending on the accounting start date and organizational accounting practices, certain Profit and Loss accounts may also require initialization.
Scenario:
A company is transitioning from a legacy accounting system to N3 AI Accounting. The finance team has finalized the prior year’s trial balance and needs to establish the company’s starting financial balances based on the closing balances from the previous accounting period.
The balances are reviewed against the latest approved Trial Balance to help ensure consistency between the previous system and the new system.
Procedure:
Prepare the opening balance information. Obtain the approved Trial Balance or equivalent financial records from the previous accounting system or accounting period.
Verify that:
Account balances are finalized
Adjustments have been posted
The balances correspond to the intended accounting start date
Determine the accounting start date. Confirm the date from which transactions will begin in the N3 AI Accounting system.
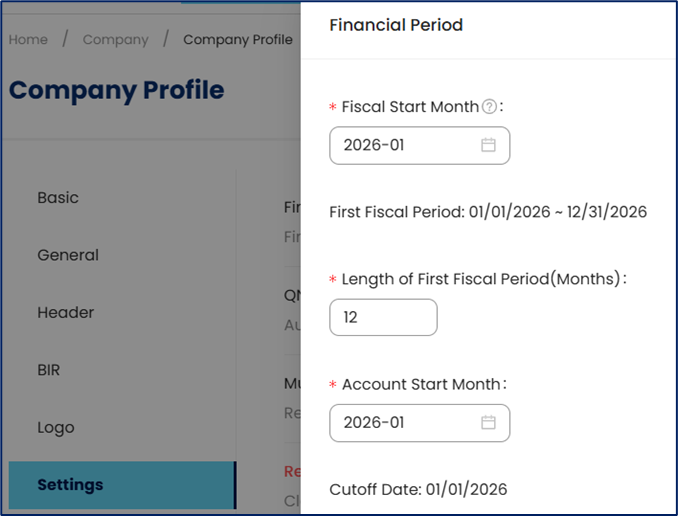
If the accounting start date coincides with the first day of the financial year, nominal accounts such as Income and Expense accounts are restricted from manual opening balance entry because these accounts normally reset at the start of a new fiscal period.
Review the chart of accounts. Ensure that all required GL accounts already exist before entering balances.
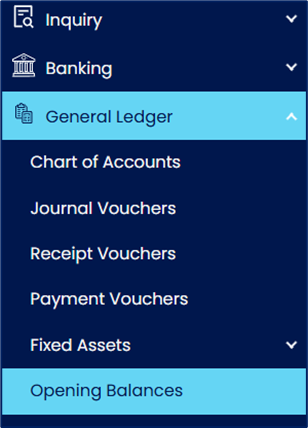
Open the opening balance setup function. Go to General Ledger > Opening Balances.
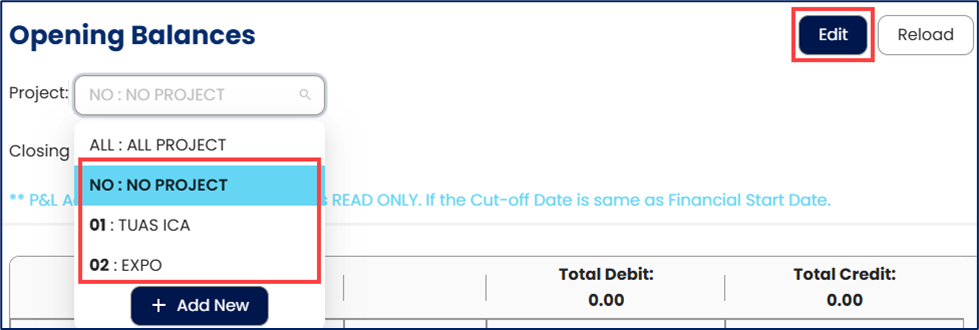
Select a Project as applicable—or choose No Project—and then click Edit.
The Project Module is an optional add-on feature used to categorize transactions for reporting purposes. Depending on company usage, projects may represent departments, branches, locations, cost centers, or actual projects.
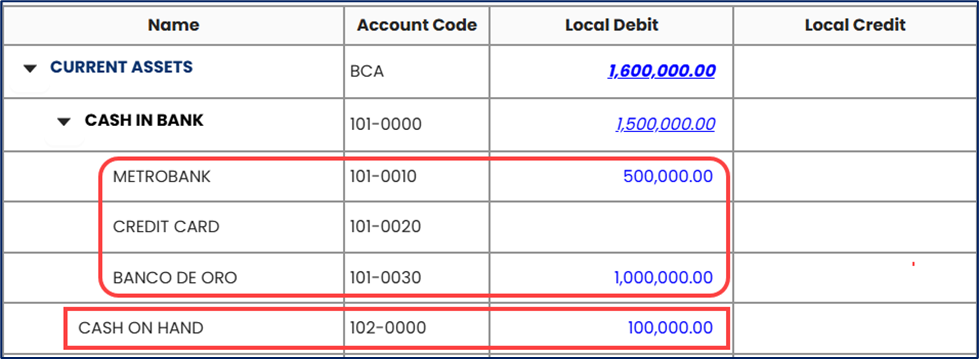
Click the expand arrow next to an Account Category or Parent Account to reveal the postable accounts for entering balances.

Input the debit or credit balance for each applicable GL account. Use the balances from the approved financial records.
Review account-specific restrictions. Certain subsidiary ledger accounts require initialization through dedicated setup processes rather than direct GL entry.
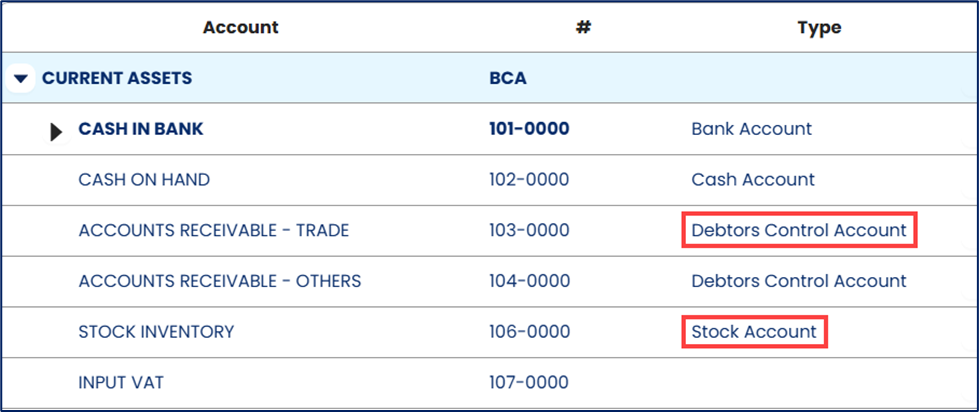
Refer to the following articles for the corresponding setup procedures:
Accounts Receivable (Debtors Control Account)
How to Record Past Customer Invoices
Accounts Payable (Creditors Control Account)
How to Record Past Supplier Bills
Stock Inventory (Stock Account)
How to Set Up GL Stock Opening Balance
Save the opening balances. After saving, the difference between the total debit & total credit on the header will be updated.
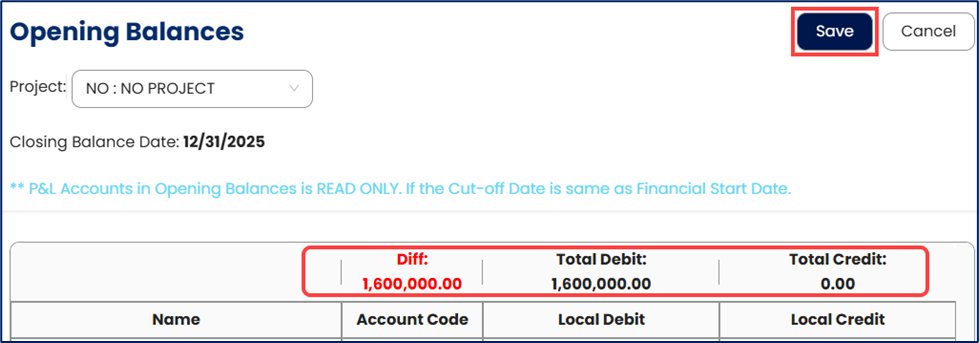
Generate and review the Trial Balance report to confirm that:
Total debits equal total credits
Account balances match the approved opening Trial Balance
Subsidiary ledger balances reconcile with their corresponding control accounts
Note:
Opening balances can be edited and updated anytime as needed before completing the implementation or financial setup review.
Application (General Use Cases):
Initialize financial records when implementing N3 AI Accounting system
Migrate balances from a legacy ERP or accounting platform
Establish beginning balances for a new financial period
Improve consistency between historical financial records and current system data
Support financial reporting preparation
Support audit preparation by maintaining structured opening balance records
System Scope: QNE AI Cloud Accounting / N3 AI Accounting
Was this article helpful?
That’s Great!
Thank you for your feedback
Sorry! We couldn't be helpful
Thank you for your feedback
Feedback sent
We appreciate your effort and will try to fix the article