Overview:
The N3 AI Accounting System is a user-friendly, localized accounting solution built for Philippine businesses. One of its essential features is the Accounts Payable module, which allows users to efficiently manage suppliers, track payables, and automate purchase transactions. Before you can record any purchases or payments, you must first create supplier records in the system.
Scenario:
You are part of the accounting team in a trading company. A new supplier has been approved, and you need to enter their information into the N3 AI Accounting System so you can record purchase invoices, track outstanding balances, and process future payments.
Solution:
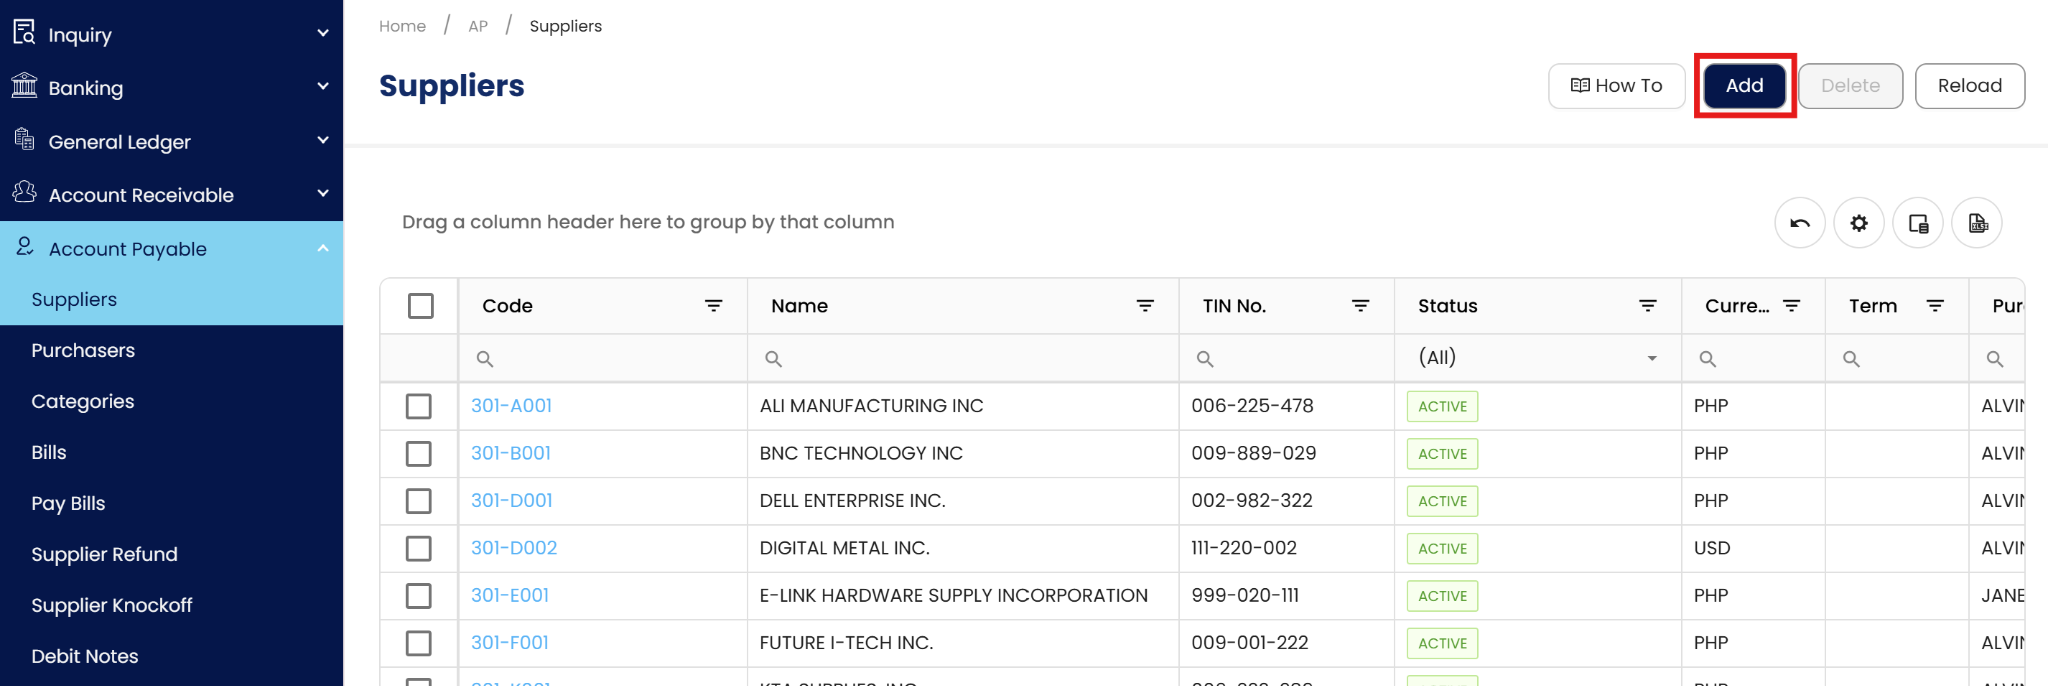
Go to the Accounts Payable Module.
From the main menu, click on Accounts Payable.
View the Supplier List
Inside the module, you'll see the list of existing suppliers. Click "Add" to create a new entry.
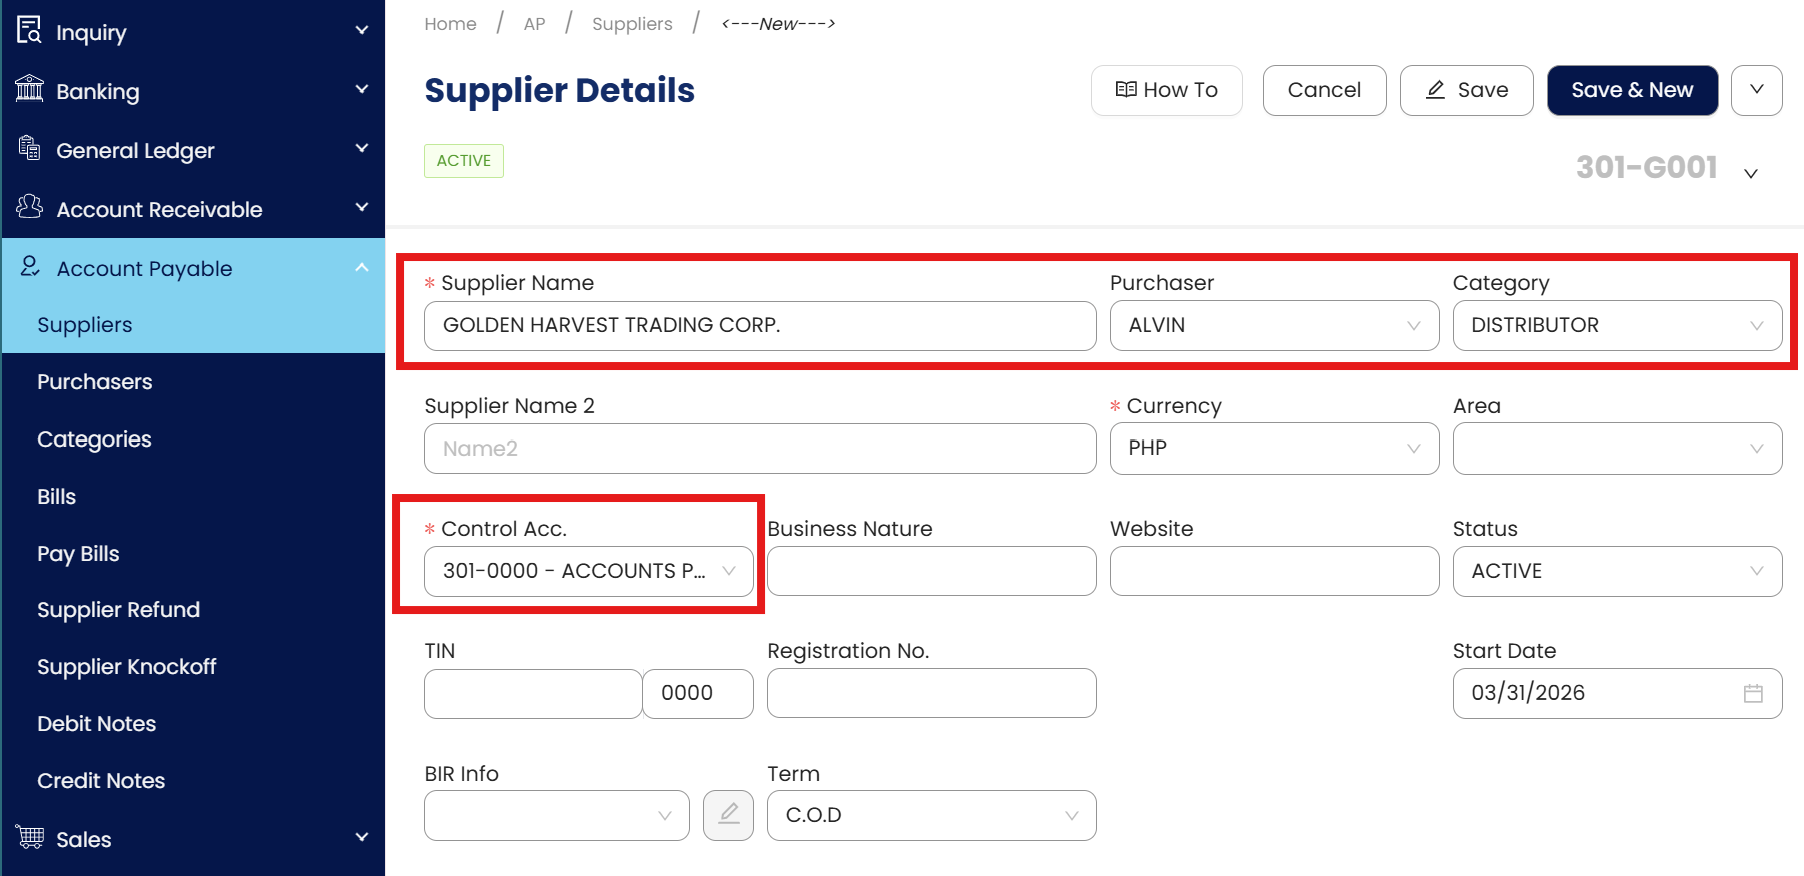
Enter all required and relevant information:
Supplier Name – the registered name of the supplier
Control Account – the default payable account (e.g., AP Trade)
Currency – usually PHP, or foreign if applicable
Account Code – the unique code that identifies the supplier
Optional but useful fields - address, TIN, contact number, and payment term.
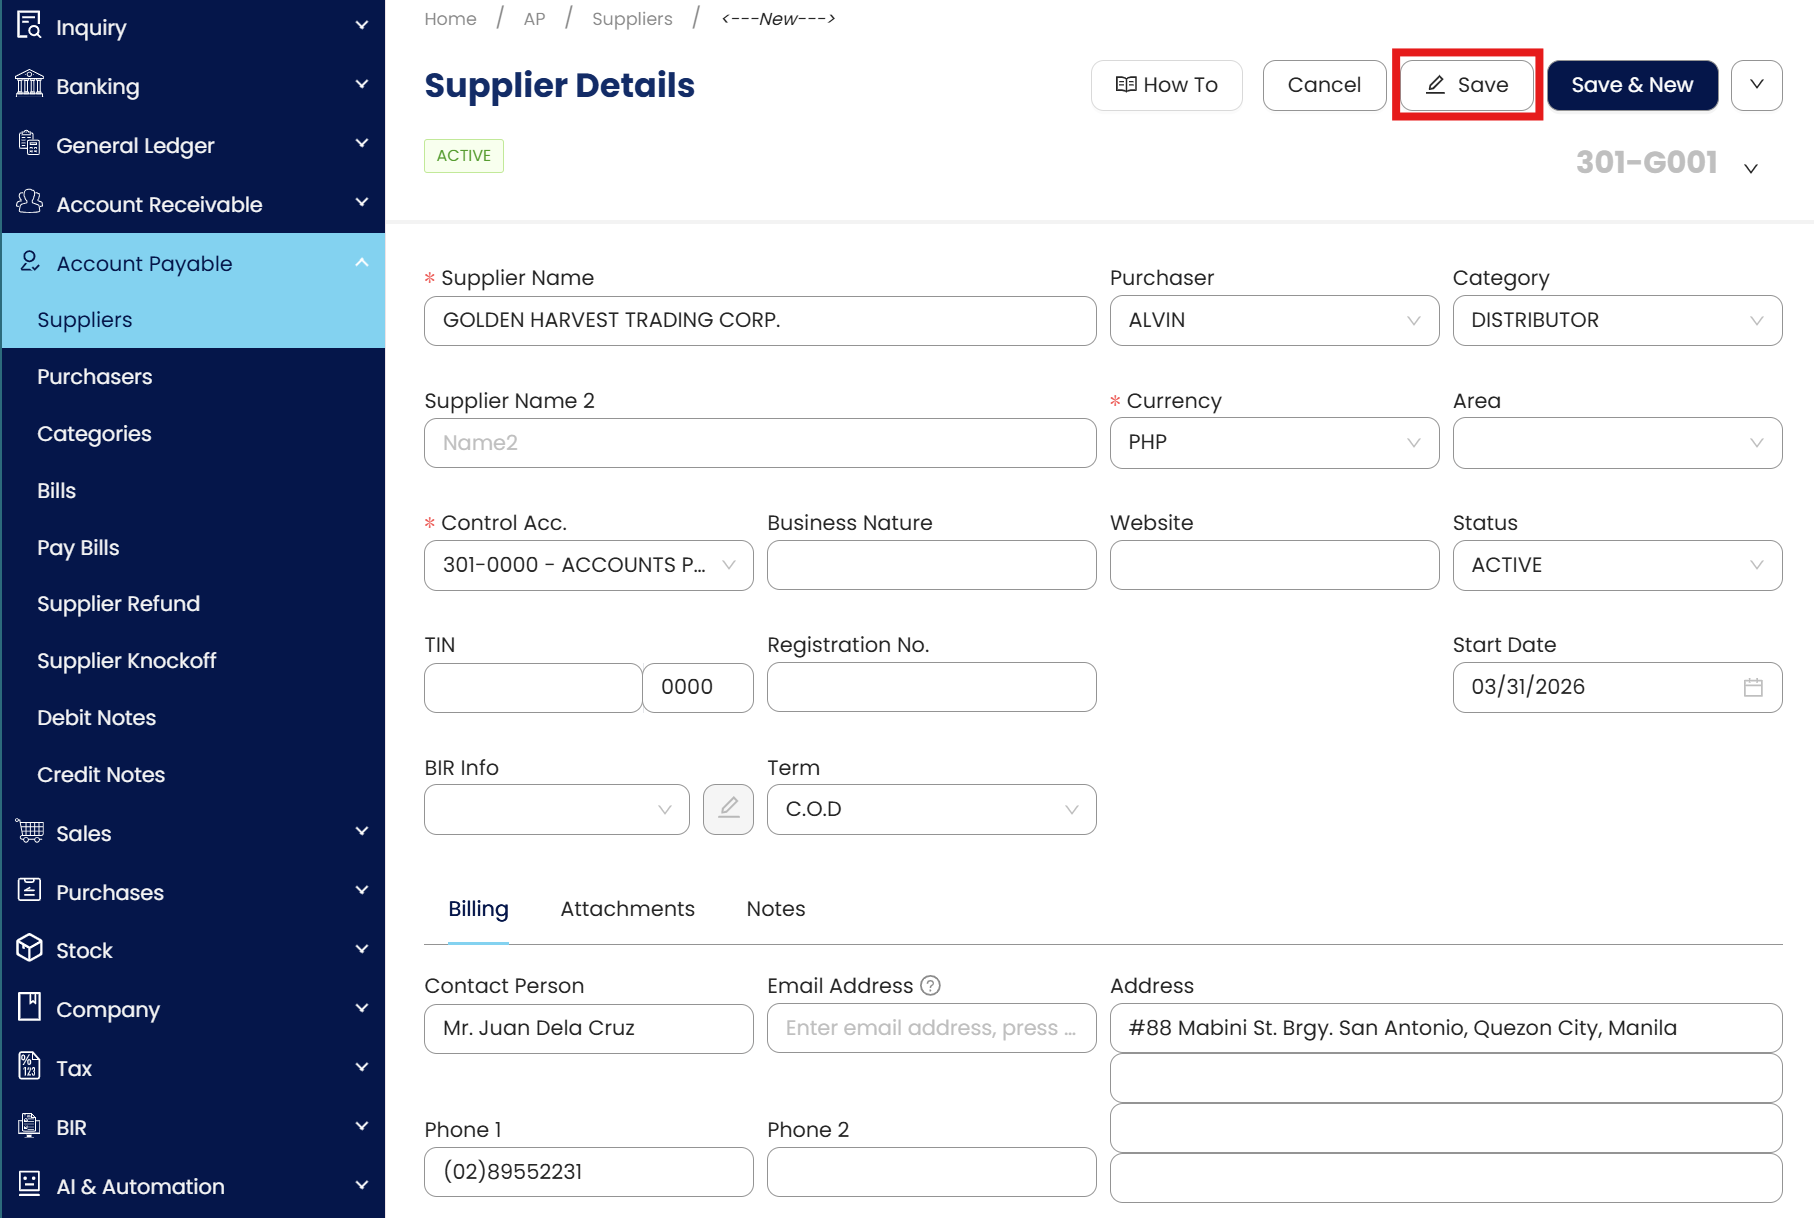
Click Save.
After filling in the details, click Save. The supplier is now added to the system and ready for use in transactions.

Procedures:
Editing Supplier Details
To maintain accurate records, you may update supplier profiles as business details change. However, once a supplier is linked to a transaction, certain structural fields are locked to preserve the audit trail and ensure consistency in financial reporting.
Locate the supplier in the Accounts Payable list and click Edit.
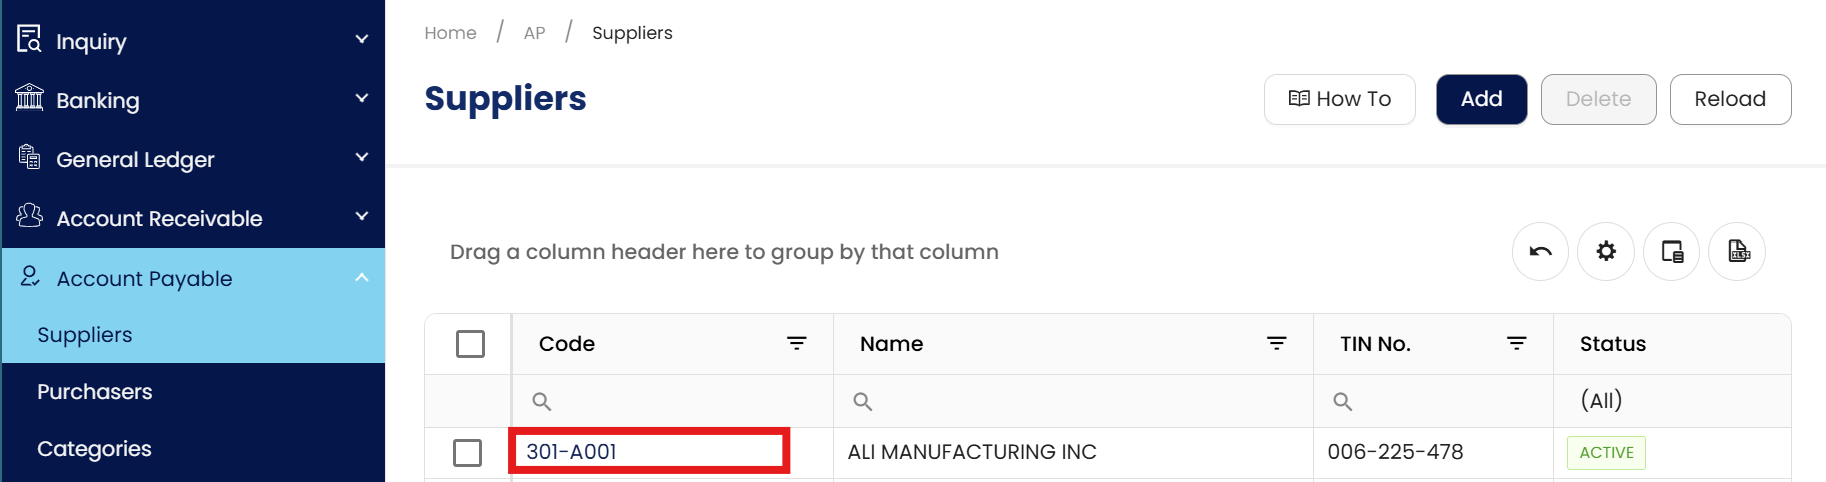

Update necessary fields (e.g., address, contact person, or TIN) and click Save.’

Note: Changing the Account Code or Control Account is restricted once transactions are posted.
Deleting a Supplier
Deleting a supplier record is only permitted if the entry was created in error and has no financial activity. For suppliers with existing history, the system enforces strict data integrity rules to comply with BIR audit requirements.
Highlight the supplier in the list and click Delete.

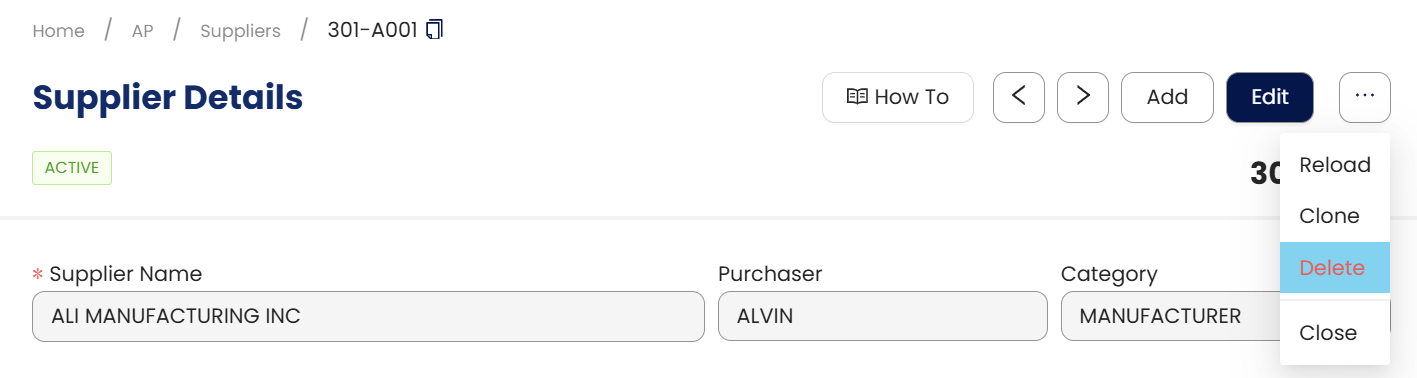
Restriction: Deletion is prohibited if the supplier has linked transactions (Invoices, Payments, or Opening Balances).
Next Step: If deletion is blocked, use the "Is Inactive" setting to preserve historical records for BIR audit purposes.
Application:
Once the supplier is created:
You can now select them when creating Purchase or Supplier Payments.
N3 will automatically post entries to the correct payable accounts.
Reports like Accounts Payable Aging, Purchase Summary, and Supplier Ledger will be updated
accurately.
Creating suppliers is a fundamental step that enables seamless processing of purchasing and payment activities, supporting accurate financial records and operational efficiency in the N3 AI Accounting
System.
Important Note:
Editing and Deleting Transactions: According to regulatory guidelines, modifications or deletions of recorded transactions in the system may be strictly prohibited once Computerized Accounting System (CAS) approved. It's vital to adhere to your company's internal policy regarding these functionalities. It is generally advisable to disable or limit the ability to edit/delete to maintain compliance with regulations.
System Scope: QNE AI Cloud Accounting / N3 AI Accounting
Was this article helpful?
That’s Great!
Thank you for your feedback
Sorry! We couldn't be helpful
Thank you for your feedback
Feedback sent
We appreciate your effort and will try to fix the article